Your dog’s personality and individual sense of style can help you decide on the perfect trim. The following are general guidelines for trimming heads and faces. Your creativity plays an important role. Experimenting with different lengths will give you different looks. Remember, it’s really about expressing yourself.
It helps to visualize the head in three sections: the top of the skull, from the occiput to the eyebrow line; the sides of the head or cheek area, from under the ear to the outside corner of the eye and down the jawline; and the chin area, from the chin to the Adam’s apple.
Trimming Around the Eyes
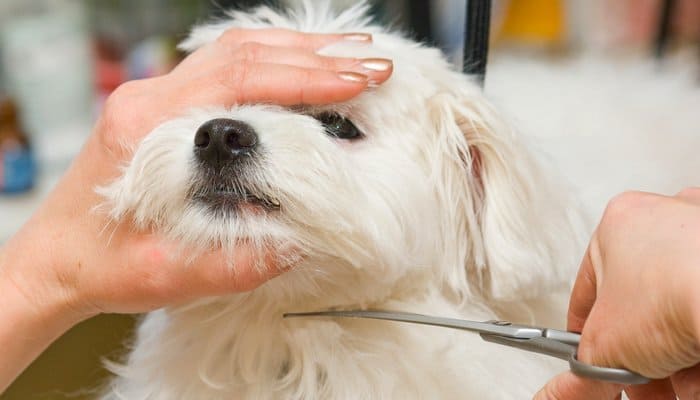
Start by trimming the hair between your dog’s eyes. This will open up his expression and make him feel more comfortable because he won’t have any hair covering his eyes. Start by using a small comb to lift the hair from the inside corner of the eyes using an outward and upward motion. Because this area is most prone to tear stains, keeping the hair short will help reduce the problem. Either with a pair of small round-tip scissors or with thinning shears—always pointing forward or away from the dog’s eyes to avoid any accident resulting from your pet’s unexpected movement—trim the hair around the eyes.
This area can also be trimmed with clippers using a #10 blade. Clippers will trim closer than a pair of scissors, but because most dogs don’t feel comfortable having vibrating clippers so close to their face, chances are you will have to use scissors. Hair around the eyes should be kept trimmed, especially for dogs with recurring eye problems.
The steps for trimming around your dog’s eyes remain the same regardless of hair type.
Remember that small changes on the holding pressure with your free hand will keep the dog’s focus away from the tools.
Dogs feel our adrenaline through our breath; popping a mint will help disguise any anxiety while working on delicate areas. Also, whispering happy songs helps relax both you and the dog while trimming the face.
Round Face
Whether you’re using scissors or clippers with an attachment comb, the steps to create a nice round face and head are the same, regardless of whether or not your dog’s coat is flat or curly. Start by combing forward the hair on top of the head.
For flat coats, use your clippers with the medium length attachment comb. This will leave approximately 1 inch (2.5 cm) of hair, which will still be fluffy but short enough to last a few weeks without growing into the face too quickly.
- Clip from the occiput to the eyebrows. When doing this, be careful not to cut the hair from the top of his ears.
- Blend the top of the head with the ears with the help of thinning shears.
- Then, holding the ears up, either with your hand or a hair clip down hair clip, use the same attachment comb to clip down the sides of the head.
- Lift the chin up and clip down the dog’s neck to the Adam’s apple. To achieve a sweet look don’t leave much hair under the chin. Keeping the chin short will help to keep the face cleaner. Remember this is the dirtiest part of the face.
- Comb all the hair forward again and go over with the clippers one more time following the same process.
- Holding the ears forward, trim the hair behind the ears in both directions and blend the top of the head to the neck, clipping the hair from the occiput down to the neck.
- Connect the nose to the inside of the ears to create a half-moon line that follows the jawline.
- Now connect the dots and blend all the edges.
We almost know how to do this instinctively because of our own experiences during our lifetime of having our hair cut. I’m sure you’ve seen your hairstylist cut your hair section by section and then check his or her work to make sure that all the sides are even and connected and that there are no stray hairs. Many times they repeat sections to make sure everything is just right.
A practical way to choose the right length of the ears is to pull the ears forward and trim the hair that passes the nose. This will not only make the ears look fabulous but also prevent them from getting dirty from food or the floor.
Finish by trimming the bottom of the ears by holding the ear tip and its hair flat in between your fingers. Place your fingers just beyond the tip of the ear flaps and hold them there. By doing so, your fingers will protect the edges of the ear flaps by stopping the scissors so that it will only cut the hair and not the skin of the ear flaps. Positioning the blade of the shears at a 45-degree angle will help you create a clean beveled edge.
Round Face Using Scissors
Imagine a circle around the dog’s head with his eyes at the center. Comb the hair at the top of this circle up and use curved shears to trim the top of the head, forming a semicircle from ear to ear. You may need to use a little bit of hairspray to help hold the hair in place while you trim it.
Comb forward the hair on top of his head and use your thinning shears to shape the dog’s visor. Start by using scissors from the outside corner of the eye always pointing the scissors toward the nose on both sides. This will open up the dog’s expression and avoid the hair from falling into his face.
Follow this by trimming the front of the bangs with the scissors at a 45-degree angle to create a beveled effect. Comb forward and trim the hair between the eyes to avoid a “horned” look.
- With the thinning shears pointing forward for safety, cut following an imaginary line connecting the outside corner of the eye to the tip of the nose. The use of thinning shears will give the dog a much softer look. After both sides are done, trim the front area to give it a softer, more rounded shape.
- Following the jawline using an imaginary half-moon curve, connect the tip of the chin with the base of the ear. Folding the ear flap over the had will keep it out of the way.
- Comb the hair up and out from the cheeks and trim it following a neat line that will help connect the side of the head with the top of the head.
- Use thinning shears to blend the top of the head with the top of the ears. Pull the ear forward and trim the hair behind the ear to blend it with the neck.
Long Hair Variations
- Trim the hair on the bottom of the ears using your fingers as a guide.
- Check your work by combing the already-cut hair in different directions to be sure no hair is sticking out.
- Finish by combing the hair in different directions and going over with the thinning shears to neaten it up.
If you are looking to give your dog a bell-shaped face, the length of hair on the chin should match the ears. Use the Adam’s apple as a point of reference to set the bottom line of the bell shape.
Short Ear Variations
If your dog’s ears fold in half when he pays attention, shaving the bottom half of the ear gives them a supercute look and keeps the ears ventilated. This is especially good for dogs with ear problems.
Start by placing the ear flap in your hand. Carefully clip the hair using a #10 blade, a #81/2 blade, or a short attachment comb in the direction the hair grows. Be constantly aware of where the edges of the ear flaps are to avoid cutting them. Holding the ear flap between your fingers and using your fingers as a guide, trim the edges from the base of the ear to the tip on the back part of the ears and then only the bottom half on the front part of the ears. The hair left on the top half of the front will add some weight to the ears to keep them in place and will help to create a nice round face.

